Jack of some things

BBQ Shack
House your equipment
5 min read
Build a Shack for Your BBQ Equipment: Essential Tips and Techniques
Outdoor cooking enthusiasts know the importance of keeping barbeque equipment organized and protected. Establishing a dedicated space will not only extend the lifespan of grills and smokers but also enhance the overall cooking experience. Building a shack specifically for BBQ equipment is an effective way to ensure everything remains in top condition.
This simple yet practical addition can serve as a storage solution and a functional workspace. Selecting a design that complements the backyard layout while providing ample storage is key. Materials and layout choices can significantly impact the shack's utility and durability.
Readers will find that constructing a BBQ shack doesn't require significant carpentry skills. With the right plan, individuals can create a personalized space that meets their specific needs. The focus is on practicality, weather resistance, and ease of use, making it an achievable project for any BBQ lover.
Planning Your BBQ Shack
When planning your BBQ shack, consider several important factors, such as where to build it, how much space it will need, the best materials, and tools, and how much you're willing to spend. Thoughtful planning will ensure the shack is both functional and cost-effective, providing the ideal space for equipment.
Choosing the Right Location
Selecting the ideal spot for your BBQ shack affects convenience and safety. Consider proximity to the main cooking area and access to utilities like water and electricity. Avoid areas exposed to strong winds or standing water.
It's also important to check local zoning laws or HOA regulations that might affect construction. Considerations like sunlight exposure can affect cooking, so ensure the area gets plenty of light while still allowing for shade. A level surface makes construction easier and safer.
Determining the Size and Layout
The size and layout should accommodate all equipment while allowing for easy movement. Start by listing all equipment and items to store, including grills, utensils, and cleaning supplies. Consider whether additional space for seating or prep work is needed.
Plan for storage and accessibility. Shelves and hooks can keep equipment organized. A workbench provides a dedicated prep area. Leave adequate space for doors or windows if ventilation is a concern, ensuring fumes do not accumulate inside the shack.
Selecting Materials and Tools
Choosing the right materials ensures durability and aesthetic appeal. For outdoor use, materials like treated wood, composite decking, or weather-resistant metal are ideal. These options prevent rot and rust. Opt for a solid foundation, such as concrete or pavers, for stability.
Gather necessary tools: saws, hammers, drills, and measuring tapes are basics. Safety gear is crucial – gloves, goggles, and helmets protect during construction. Consider reusable materials to cut costs. Make a checklist of needed items before starting.
Budgeting and Cost Analysis
Set a clear budget to avoid overspending. Outline potential expenses, such as materials, tools, and any hired labor. Factor in permit costs and unexpected expenses, like weather damages or plan changes. Get quotes for larger items or services to find the best rates.
Compare DIY construction costs with hiring professionals. Using reclaimed materials can save money but may require extra prep work. Track expenses throughout the project, adjusting the budget as needed to stay on target. An organized approach can prevent costly oversights.
Construction Process
Building a shack for your BBQ equipment involves careful planning and step-by-step construction. This ensures the structure is functional and durable, providing a shielded area to store your equipment, tools, and accessories.
Preparing the Site
Selecting the site involves assessing the ground for leveling and sunlight exposure. It is crucial to clear debris and ensure proper drainage. After marking the perimeter, use stakes and string to set boundaries. This ensures a precise foundation layout.
The site should be accessible and compliant with local zoning laws. Proper permits should be obtained if necessary. Remove grass and topsoil to prepare the area for more detailed groundwork. Compact the soil to create a stable base for the structure.
Foundation and Flooring
A strong foundation is essential for stability. Options include concrete slabs or wooden skids, depending on preference and the terrain. When using concrete, pour a level slab with enough depth to support the shack’s weight.
Wooden skids offer a flexible alternative, allowing easier relocation if needed. For flooring, pressure-treated lumber can help prevent decay. Proper flooring not only supports the structure but also aids in insulation. Waterproof materials ensure longevity and resilience against weather conditions.
We built ours directly on top of our back deck. We extended the deck by about 4 feet to accommodate our smoke shack.
Framing and Roofing
Begin framing by constructing the walls using timber or metal studs. Ensure corners are square and use braces for stability. For the roof, select materials that offer protection against weather, such as corrugated metal or asphalt shingles.
Connect the roof to wall frames securely, maintaining a slight slope for rain runoff. Doors and windows should be framed precisely to accommodate any weather-stripping or insulation. Framing determines the shack's overall shape and strength, making precision crucial.
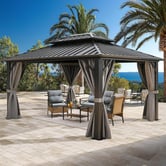
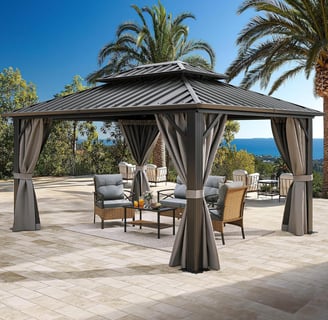
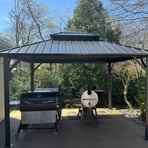
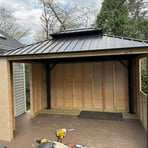
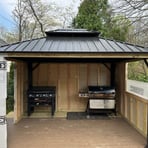
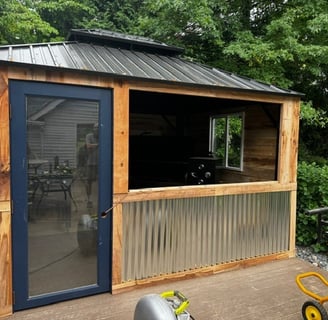
We used a combination of a gazebo (primarily for the roof) and wood framing for our build.
Exterior Features and Customization
Adding siding enhances protection and aesthetics. Options include wood, vinyl, or metal, each offering different benefits. Weatherproof paints or stains can add an extra layer of defense against the elements. Gutters can be installed to divert water away from the base, preventing erosion.
Custom features like lighting, shelving, and hooks maximize usability. Adjustable shelving can help organize equipment neatly. Install ventilation features, like vents or small windows, to manage smoke and moisture levels.
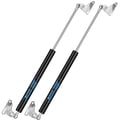
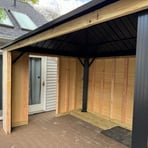
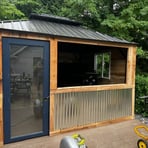
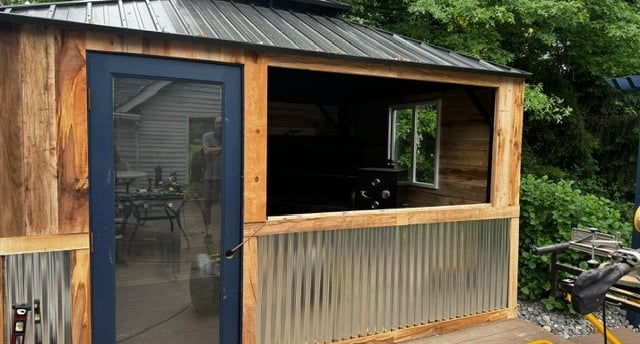
We found adding a window and bar opening helped with smoke control.
Interior Setup for BBQ Equipment
Organize the interior to maximize space efficiency for BBQ equipment. Consider incorporating built-in cabinets for storage and countertops for preparation. Use racks for hanging tools and utensils.
Safety is paramount; ensure electrical wiring adheres to safety standards if you plan on integrating lighting or power. Fireproof materials may be necessary if storing combustible items. Design the interior to allow easy cleaning and maintenance, which prolongs the life of the equipment.
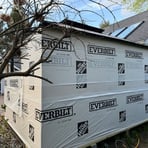
Our Smoke Shack
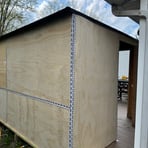
We bought a gazebo and built our smoke shack around it. We used pallet wood for both the inside and the outside. Here are a few of the parts we used in our build:
Gazebo: https://amzn.to/40PpqWX
Gas struts (for the bar opening): https://amzn.to/4gdLL4D
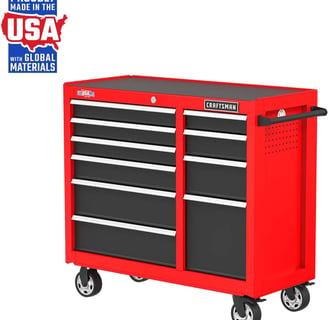
Craftsman toolbox (for utensils, gloves, etc.): https://amzn.to/3Wu3NIP
Here are a few pics of the build: